
코드네임 :
📱 모바일프로그래밍 - (중간 - Midterm.Android) 모르는거 정리2 📱 본문
1. OnClickListener vs OnTouchListener - 근데 그냥 터치가 더 복잡한거고 걍 비슷한듯
onTouchListener와 onClickListener는 안드로이드에서 사용자 입력(터치) 이벤트를 처리하기 위한 리스너입니다. 두 리스너 모두 뷰(View)에 대한 터치 이벤트를 처리하지만, 용도와 동작 방식이 다릅니다.
1. onClickListener
- 역할: 사용자가 뷰를 클릭했을 때 (즉, 짧게 누르고 뗐을 때) 발생하는 이벤트를 처리합니다.
- 동작 방식: 단순히 클릭(터치 후 손가락을 떼는 동작)을 감지하여 동작을 수행합니다. 사용하기 쉽고, 클릭에 반응하는 대부분의 UI 요소(버튼, 리스트 항목 등)에 자주 사용됩니다.
- 호출 시점: 사용자가 뷰를 터치한 후 손가락을 떼는 순간 호출됩니다.
예시
java
코드 복사
Button button = findViewById(R.id.my_button); button.setOnClickListener(new View.OnClickListener() { @Override public void onClick(View v) { // 버튼이 클릭되었을 때 수행할 동작 Toast.makeText(MainActivity.this, "Button clicked!", Toast.LENGTH_SHORT).show(); } });
- 위 예시에서 버튼이 클릭되면(터치 후 손가락을 떼면) 메시지가 나타납니다.
2. onTouchListener
- 역할: 뷰에서 발생하는 모든 터치 이벤트(터치, 이동, 손가락 떼기 등)를 세부적으로 처리할 수 있습니다.
- 동작 방식: 터치 이벤트가 발생할 때마다 호출되며, 터치의 다양한 상태 (ACTION_DOWN, ACTION_MOVE, ACTION_UP 등)를 감지하여 세밀하게 처리할 수 있습니다.
- 호출 시점: 사용자가 뷰에 손가락을 올리거나 움직이거나 뗄 때마다 호출됩니다. onClickListener보다 더 많은 경우의 수를 처리할 수 있기 때문에 드래그, 스와이프 같은 제스처 처리가 가능합니다.
예시
java
코드 복사
View view = findViewById(R.id.my_view); view.setOnTouchListener(new View.OnTouchListener() { @Override public boolean onTouch(View v, MotionEvent event) { switch (event.getAction()) { case MotionEvent.ACTION_DOWN: // 뷰가 터치되었을 때의 동작 Toast.makeText(MainActivity.this, "Touched!", Toast.LENGTH_SHORT).show(); return true; case MotionEvent.ACTION_MOVE: // 터치한 채로 손가락이 움직일 때의 동작 return true; case MotionEvent.ACTION_UP: // 손가락이 뷰에서 떨어졌을 때의 동작 return true; } return false; } });
- 이 예시에서는 뷰에 터치가 발생했을 때의 다양한 동작(ACTION_DOWN, ACTION_MOVE, ACTION_UP)을 세부적으로 처리할 수 있습니다.
차이점 요약
구분onClickListeneronTouchListener| 주된 사용 용도 | 클릭 이벤트 처리 (간단한 터치와 손 떼기 동작 감지) | 모든 터치 이벤트 (ACTION_DOWN, ACTION_MOVE, ACTION_UP) 처리 |
| 호출 시점 | 터치 후 손가락을 뗄 때 | 터치가 시작되고, 움직이고, 끝나는 모든 순간 |
| 주로 사용되는 경우 | 버튼 클릭, 간단한 클릭 동작 감지 | 드래그, 스와이프, 커스터마이징된 제스처 인식 |
| 처리할 수 있는 이벤트 | 클릭(터치 후 떼기) | 터치, 움직임, 떼기 등 다양한 터치 관련 이벤트 |
언제 어떤 것을 사용해야 할까?
- 간단한 클릭만 처리하고 싶을 때: onClickListener를 사용하는 것이 적합합니다. 예를 들어, 버튼 클릭이나 리스트 항목 선택 등을 처리할 때 유용합니다.
- 터치 동작을 세밀하게 제어하고 싶을 때: onTouchListener가 더 적합합니다. 예를 들어, 드래그 앤 드롭, 스와이프 제스처, 터치와 함께 다른 동작을 결합한 복잡한 인터랙션을 구현할 때 사용합니다.
요약하자면, onClickListener는 간단한 클릭 이벤트를 처리하는 데 사용하고, onTouchListener는 터치의 세부적인 상태를 감지하고 처리할 때 사용됩니다.
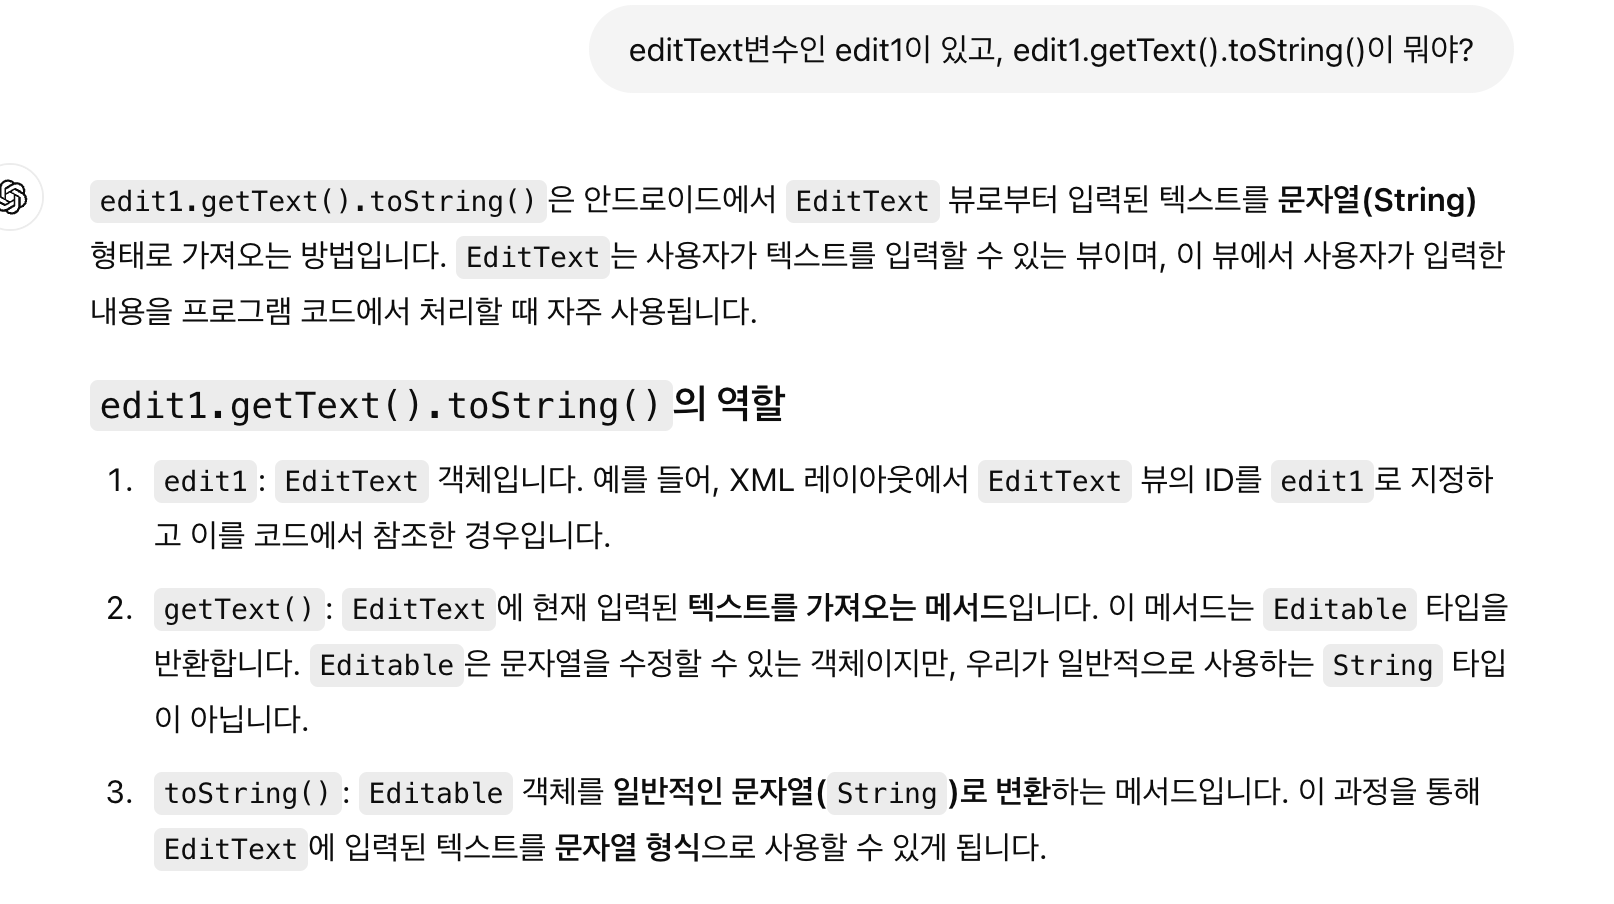
2. edit1.getText().toString()
호오... Editable 타입이라는게 잇군.....
3. Integer.parseInt()란?
Integer.parseInt()는 문자열(String)을 정수(Integer)로 변환하는 메서드
activity_main.xml
<?xml version="1.0" encoding="utf-8"?>
<LinearLayout xmlns:android="http://schemas.android.com/apk/res/android"
    xmlns:app="http://schemas.android.com/apk/res-auto"
    xmlns:tools="http://schemas.android.com/tools"
    android:id="@+id/main"
    android:layout_width="match_parent"
    android:layout_height="match_parent"
    android:orientation="vertical"
    tools:context=".MainActivity">

    <EditText
        android:layout_width="wrap_content"
        android:layout_height="wrap_content"
        android:layout_margin="100dp"
        android:hint="숫자 입력하세요"
        android:layout_weight="1"
        android:id="@+id/Edit1"/>

    <EditText
        android:layout_width="wrap_content"
        android:layout_height="wrap_content"
        android:layout_margin="10dp"
        android:hint="숫자를 입력하세요"
        android:layout_weight="1"
        android:id="@+id/Edit2"/>

    <Button
        android:layout_width="match_parent"
        android:layout_height="wrap_content"
        android:id="@+id/BtnAdd"
        android:text="더하기"/>

    <Button
        android:layout_width="match_parent"
        android:layout_height="wrap_content"
        android:id="@+id/BtnSub"
        android:layout_margin="10dp"
        android:text="빼기"/>

    <TextView
        android:layout_width="wrap_content"
        android:layout_height="wrap_content"
        android:id="@+id/TextResult"
        android:textSize="30sp"
        android:textColor="#ff00"
        android:layout_margin="10dp"
        android:layout_weight="1"
        android:text="계산결과:"/>
</LinearLayout>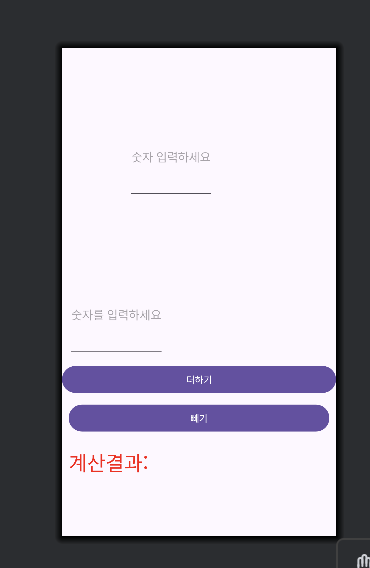
MainActivity.java
package com.example.midterm;

import android.os.Bundle;
import android.view.View;
import android.widget.Button;
import android.widget.CheckBox;
import android.widget.CompoundButton;
import android.widget.EditText;
import android.widget.TextView;

import androidx.activity.EdgeToEdge;
import androidx.appcompat.app.AppCompatActivity;
import androidx.core.graphics.Insets;
import androidx.core.view.ViewCompat;
import androidx.core.view.WindowInsetsCompat;

public class MainActivity extends AppCompatActivity {


    EditText edit1, edit2;
    Button btnAdd;
    TextView textResult;
    String num1, num2;
    Integer result;


    @Override
    protected void onCreate(Bundle savedInstanceState) {
        super.onCreate(savedInstanceState);
        EdgeToEdge.enable(this);
        setContentView(R.layout.activity_main);
        ViewCompat.setOnApplyWindowInsetsListener(findViewById(R.id.main), (v, insets) -> {
            Insets systemBars = insets.getInsets(WindowInsetsCompat.Type.systemBars());
            v.setPadding(systemBars.left, systemBars.top, systemBars.right, systemBars.bottom);
            return insets;
        });


        edit1 = findViewById(R.id.Edit1); //findViewById : XML에서 정의된 View(위젯)을 Java코드에서 참조
        edit2 = findViewById(R.id.Edit2);
        btnAdd = findViewById(R.id.BtnAdd);
        textResult = findViewById(R.id.TextResult);

        btnAdd.setOnClickListener(new View.OnClickListener() {
            @Override
            public void onClick(View view) {
                num1 = edit1.getText().toString(); // getText() : EditText에 현재 입력된 텍스트를 가져옴
                num2 = edit2.getText().toString();       // 이때 가져온 타입이 Editable이라 toString()으로 변환 해주는거...
                result = Integer.parseInt(num1) + Integer.parseInt(num2);
                textResult.setText("계산 결과 " + result.toString());
            }
        });

    }
}'👾Android > Android_JAVA' 카테고리의 다른 글
| 📱 모바일프로그래밍 - (중간) 모르는거 정리 4 📱 (1) | 2024.10.24 |
|---|---|
| 📱 모바일프로그래밍 - (중간) 모르는거 정리 3 (Midterm2.android)📱 (0) | 2024.10.24 |
| 📱 모바일프로그래밍 - (중간) 모르는거 정리 1 (위젯) 📱 (0) | 2024.10.23 |
| 📱 모바일프로그래밍 - 명시적 인텐트📱 (0) | 2024.10.18 |
| 📱 모바일프로그래밍 - 액티비티와 인텐트 기본📱 (0) | 2024.10.18 |
'👾Android/Android_JAVA' Related Articles
more


